Sunday, July 22, 2012

Yogurt Popsicles

MSCD beginner recipe

Is it hot where you are? A few days ago the heat index was 118 here. Even the flies are sweating. But something good has come of this heat - this recipe. Well, I guess it's not really a recipe, but a method. An easy, cold, wonderfully delicious method for making healthy, fruit juice sweetened yogurt popsicles. 


You'll need:
1 (6 oz.) container Cascade Fresh yogurt (pick your favorite flavor)
1 popsicle stick


Step 1: Peel back the foil top and stir to mix the yogurt and fruit.


Step 2: Press the foil top back onto the yogurt cup. Slice a small opening in the foil, big enough for a popsicle stick.


Step 3: Insert popsicle stick. 

Repeat as many times as your freezer space allows!

Step 4: Place yogurt in the freezer for several hours, until fully frozen.


Step 5: Remove foil top and run water over the outside of the yogurt cup for a few seconds until the popsicle releases.


Step 6: The best step: Enjoy your healthy popsicle!


Pictured is the toothless grin of my son Tucker. He's not always a willing guinea pig for Momma's new recipes, but he was more than happy to help me sample this one!


Note: We've tried several different flavors for these popsicles, but our favorite by far is Cascade Fresh's Orange Cream. Remember those Orange Creamsicles from childhood? That's what these taste like. And the Lemon Chiffon pictured above reminds me of those frozen lemon icees in a cup I used to get at Six Flags. 


Now go make food memories with your kids, except this time make them healthy ones!


Wednesday, March 14, 2012

Well said


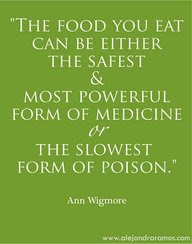
I saw this quote scroll by today on facebook and I just had to share it. So very, very true. I couldn't have said it better myself!

Monday, February 27, 2012

Caramelized Brussels Sprouts

MSCD beginner recipe

I'm a Brussels sprouts newbie. This was my first recipe to try with them, and it turned out great! Very fast and easy. Serve them as a side with any meal or make them the main dish with a side of Deb's Cornbread. If you'd like to spice it up a bit, add 1 tsp. red pepper flakes when you're sautéing the garlic. Freeze leftovers to add to your next vegetable soup.


1 (1 lb.) bag Brussels sprouts (approximately 24), sliced into ribbons, ends removed

¼ of a yellow onion, sliced into ribbons

2 Tbs. minced garlic

2 Tbs. butter

extra virgin olive oil

2 Tbs. honey

2 tsp. Mrs. Dash Table Blend seasoning

1 tsp. sea salt

½ cup sliced almonds

Melt butter and a drizzle of olive oil in a skillet over medium heat. Add garlic and sauté for a minute. Add Brussels sprouts and onion. Sauté for a couple minutes. Add seasoning and honey while continuing to sauté for a total of around 5 minutes. Stir in almonds and remove from heat. Serve immediately.


Thursday, February 16, 2012

Cheesecake

MSCD 12-month recipe

Cheesecake. mmmm...

It took many recipe flops to come up with this mouth-watering, healthy delight! It's one of my Mom's favorites, which is why I made it for her surprise princess birthday party. But she's not really 60. (wink, wink)

This cheesecake is a mixture of cream cheese, honey and maple syrup, accompanied by a simple cinnamon and honey oat crust to upgrade from the traditional graham cracker crust laden with enriched flour, sugar and hydrogenated oil. The cake's topping is optional and flexible. My favorite is strawberries, but serving it plain or topping with cherries or any berry would be excellent.


Crust

1 cup whole oats

1 cup oat flour

¼ cup applesauce

3 Tbs. butter, finely diced

1 Tbs. honey

1 ½ Tbs. water

1 tsp. cinnamon

pinch of salt

extra virgin olive oil

Lightly chop oats in a blender. In a bowl, combine chopped oats with remaining ingredients, except olive oil, forming a ball by working the wet ingredients into the dry ingredients with your hands until the entire ball of dough is moist. Drizzle the dough ball with olive oil to coat. Butter or oil a 10-inch springform cake pan. Press the crust dough to an even thickness along the bottom and sides of the dish. Make the side crusts tall enough to hold the filling and strawberry topping. Place in refrigerator until ready to use.


Filling

4 (8 oz.) packages cream cheese, softened

4 eggs

¾ cup honey

¼ cup maple syrup

1 Tbs. lemon juice

1 tsp. vanilla

Place eggs, honey, syrup, lemon juice and vanilla in a bowl. Mix to combine. In a separate bowl, whip cream cheese with an electric mixer. Add egg mixture to cream cheese, a little at a time, whipping until creamy. Pour filling into crust. Bake at 300° for 1 hour and 15 minutes.


Topping

1 (16 oz.) bag frozen strawberries

½ cup honey

While the cake is baking, make the topping. Place strawberries and honey in a saucepan over medium low to medium heat. As the strawberries begin to melt, smash mixture with a potato masher until a chunky sauce is formed. Place topping in the refrigerator to thicken.

When the cake is done, remove it from the oven and allow it to cool. Remove cake from springform pan and place on a decorative serving dish. Top with strawberry topping. If you can resist, the cake is best after it is chilled in the refrigerator.


Wednesday, February 15, 2012

Orange you glad we're friends, Valentine?

Holidays equal candy. And cookies and cake pops and cupcakes and icing and SPRINKLES! What's a health-conscience family to do?


With a Kindergartener and a preschooler, I face these dilemmas - a lot. The most recent dilemma was Valentine's Day. I wanted to make homemade valentines with my sons. But I just could not buy candy. I wanted to do something fun and witty (and cheap!), and I just knew I could come up with something that wasn't coated in sugar! I brainstormed with my husband one night. His idea was to give all the kids a bag of rocks with a note that said "Valentine, you rock!"


Witty. Check.
Cheap. Check.
No sugar. Check.


But can you imagine what would happen if I gave a bunch of 4 and 6-year-olds a bag of rocks?! So, instead, I went with my idea. Little cutie mandarine oranges with a card that read "Orange you glad we're friends? Happy Valentine's Day!" I designed the cards in Adobe Illustrator and printed them at Office Depot, but you by no means have to get that fancy. Construction paper and a marker would work just as well. I had each son sign the card with a Sharpie and put it and an orange in a snack size ziplock bag. The cost was 29 cents per valentine, which was great since we made 63!


Having the boys hand-make the valentines gave me some special time with each son. We talked about what love is and who we love and why we love while we assembled the bags. And because the boys helped make the valentines, they were invested and it meant so much more to them when they gave the valentines to their friends. My 4-year-old handed his out at his party this morning, and his teachers commented on how big his smile was while he was doing so.


And guess who else smiled? The recipients! All of the kids were so excited to get an orange. The teachers told me they were all so happy to have an orange, too, because their tummies hurt from gorging on chocolate the previous day. And the parents. Of course they were smiling, too, and asking to steal the idea (which I encourage you to do, too!) One mom said she is going to make them as party favors for her daughter's birthday tomorrow. Great idea.


For my Kindergartener's Christmas party a couple months ago, I had made fruit kabobs. And guess what the kids requested for their Valentine Party? More fruit kabobs! Not more candies and cookies - more fruit. The kabobs are very easy, fun and healthy. And pretty, too!


One tip I would give you is to snip the sharp tips off the ends of the sticks after you've threaded the fruit if you are making the kabobs for young children, which thankfully I did. The sticks become light sabers and swords soon after the fruit is gone! Yes, my son is the one that started the light saber fight...


For our family party at home, I made the delicious strawberry muffins pictured below with organic oat flour, brown rice flour, fresh strawberries and honey, just to name a few ingredients. The icing is simply cream cheese whipped with honey and a few drops of red food coloring. I hope to post the full recipe soon. Can someone please send me a babysitter?!


Remember that you CAN give your kids and coworkers and friends a healthy holiday. All you have to do is think outside the sugar-coated box.

Tuesday, April 5, 2011

Banana Nut Pancakes

MSCD 6, 9 or 12-month recipe (see note below)


Breakfast for dinner? Yes, please!

2 cups oat flour
½ cup brown rice flour
½ cup pecan flour
2 tsp. baking soda
2 tsp. aluminum-free baking powder
2 tsp. cinnamon
4 eggs
1 ½ cup milk (plain brown rice “milk” drink, organic cow milk, or goat’s milk)
1 cup live yogurt
2 Tbs. extra virgin olive oil
2 tsp. vanilla
1-2 bananas, halved lengthwise and thinly sliced
1 cup walnuts, chopped

In a large bowl, mix first 6 dry ingredients. In a separate bowl, mix next 5 wet ingredients. Pour wet ingredients into the dry and mix with an electric mixer on high until completely incorporated and lump-free. Stir in bananas and walnuts.

Heat skillet or griddle at medium heat. Drizzle with olive oil to prevent sticking. Pour batter by the ½-cupfuls onto griddle. When bubbles form throughout batter, flip the pancake to cook the other side. Remove to serving dish when cooked through. Repeat until you’ve used all the batter.

Serves a family of 5! If you don’t need that many pancakes, simply half the recipe.

NOTE:
Choose the ingredients for this recipe according to where you are on the diet:
  • brown rice and goat milk OK at 3 months
  • cow milk OK at 12 months 
  • oat flour OK at 6 months
by Laura Schroeder

Wednesday, March 9, 2011

Chicken Spaghetti

MSCD 3, 6 or 12-month recipe (see note below)


Chicken
3 boneless, skinless chicken breasts
sea salt
pepper
garlic powder
paprika
extra virgin olive oil

Drizzle chicken with olive oil and season to taste with salt, pepper, garlic and paprika. Bake, grill or pan fry until center of chicken is white and its juices run clear. Dice chicken into dime-sized pieces.

Pasta
1 (16 oz) package Tinkyada brown rice spaghetti OR brown rice spinach spaghetti

Cook in a large stock pot according to package instructions. I always use the “Easy and Energy-Saving” cooking method printed on the front of the package.

Sauce
½ cup extra virgin olive oil OR 1 stick of butter
2 Tbs. minced garlic
3 Tbs. oat flour
3 Tbs. brown rice flour
2 cups chicken broth, room temperature
2 cups milk, room temperature (plain brown rice “milk” drink, organic cow milk, or goat’s milk)
½ cup cheddar cheese, shredded
½ cup Monterey jack cheese, shredded
½ cup Parmesan cheese, grated
1 (7 oz.) can green chiles, drained
sea salt
pepper

Garnish (optional)
diced tomatoes
sliced scallions

Coat large skillet with the olive oil or butter. Heat oil over medium heat or melt butter. Add garlic. Slowly sprinkle in brown rice and oat flour, whisking continually until flours are lightly browned. Slowly add broth and milk of your choice, whisking continually to prevent lumps. (Having them at room temperature also helps prevent lumps.) Once flours and liquids are completely incorporated, begin adding the 3 cheeses a little at a time, stirring between each addition to make sure your sauce is nice and creamy. Season with salt and pepper to taste. Stir in green chiles and diced chicken.

When the sauce is fully heated, stir pasta with the sauce and serve as is or garnish with diced tomatoes and scallions.

NOTE: 
Choose the ingredients for this recipe according to where you are on the diet:
·         brown rice and goat milk OK at 3 months
·         cow milk OK at 12 months 
·         oat flour OK at 6 months
·         If you want to try this recipe at 3 months, eliminate the oat flour from the sauce and just double the brown rice flour.

by Laura Schroeder